Titles, generators, and adjustment layers
Not everything on your timeline comes from a file. Sprocket can generate clips for you — a title card, a name-and-role lower third, rolling credits, a solid colour — and drop them straight onto the timeline. There’s also a special adjustment layer that applies effects to everything beneath it, so you can grade a whole run of clips in one place.
What’s in this guide
Section titled “What’s in this guide”- Adding a title or other generator
- What each generator does
- Editing a title’s text
- Styling a title in the Inspector
- Adjustment layers
Adding a title or other generator
Section titled “Adding a title or other generator”Put the playhead where you want the new clip to start, then open Clip ▸ Insert and choose what to add:
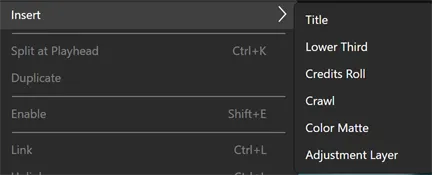
Each choice drops a ready-made clip — about five seconds long — onto a video track at the playhead. Once it’s there, you edit it like any other clip: move it, trim it, change its length, or stack it on a higher video track so it sits over your footage.
Tip: The same generators also live in the Project panel as items you can drag straight onto a track, if you’d rather place one by hand than insert it at the playhead.
What each generator does
Section titled “What each generator does”| Generator | What you get |
|---|---|
| Title | Centred text over a transparent background — the classic title card. |
| Lower Third | A name and role over a background bar in the lower-left corner. |
| Credits Roll | Multiple lines of credits scrolling from the bottom to the top. |
| Crawl | A single line of text crawling from right to left, ticker-style. |
| Color Matte | A solid block of colour, handy as a background or a quick fade-to-colour. |
All of the text generators share the same set of controls in the Inspector — they just start with different defaults. A Lower Third is a title that begins with two lines of text and a background box; Credits Roll and Crawl are titles that start out scrolling.
Editing a title’s text
Section titled “Editing a title’s text”The fastest way to change what a title says is to double-click the title clip
on the timeline. A text box opens right on the clip — type your text, then press
Enter (or click away) to commit it. Press Escape to cancel without changing
anything.
This edits the title’s main line of text. For a second line, colours, fonts, and everything else, use the Inspector.
Styling a title in the Inspector
Section titled “Styling a title in the Inspector”Select a title clip and the Inspector (right-hand panel) fills with its text controls, grouped into three sections:
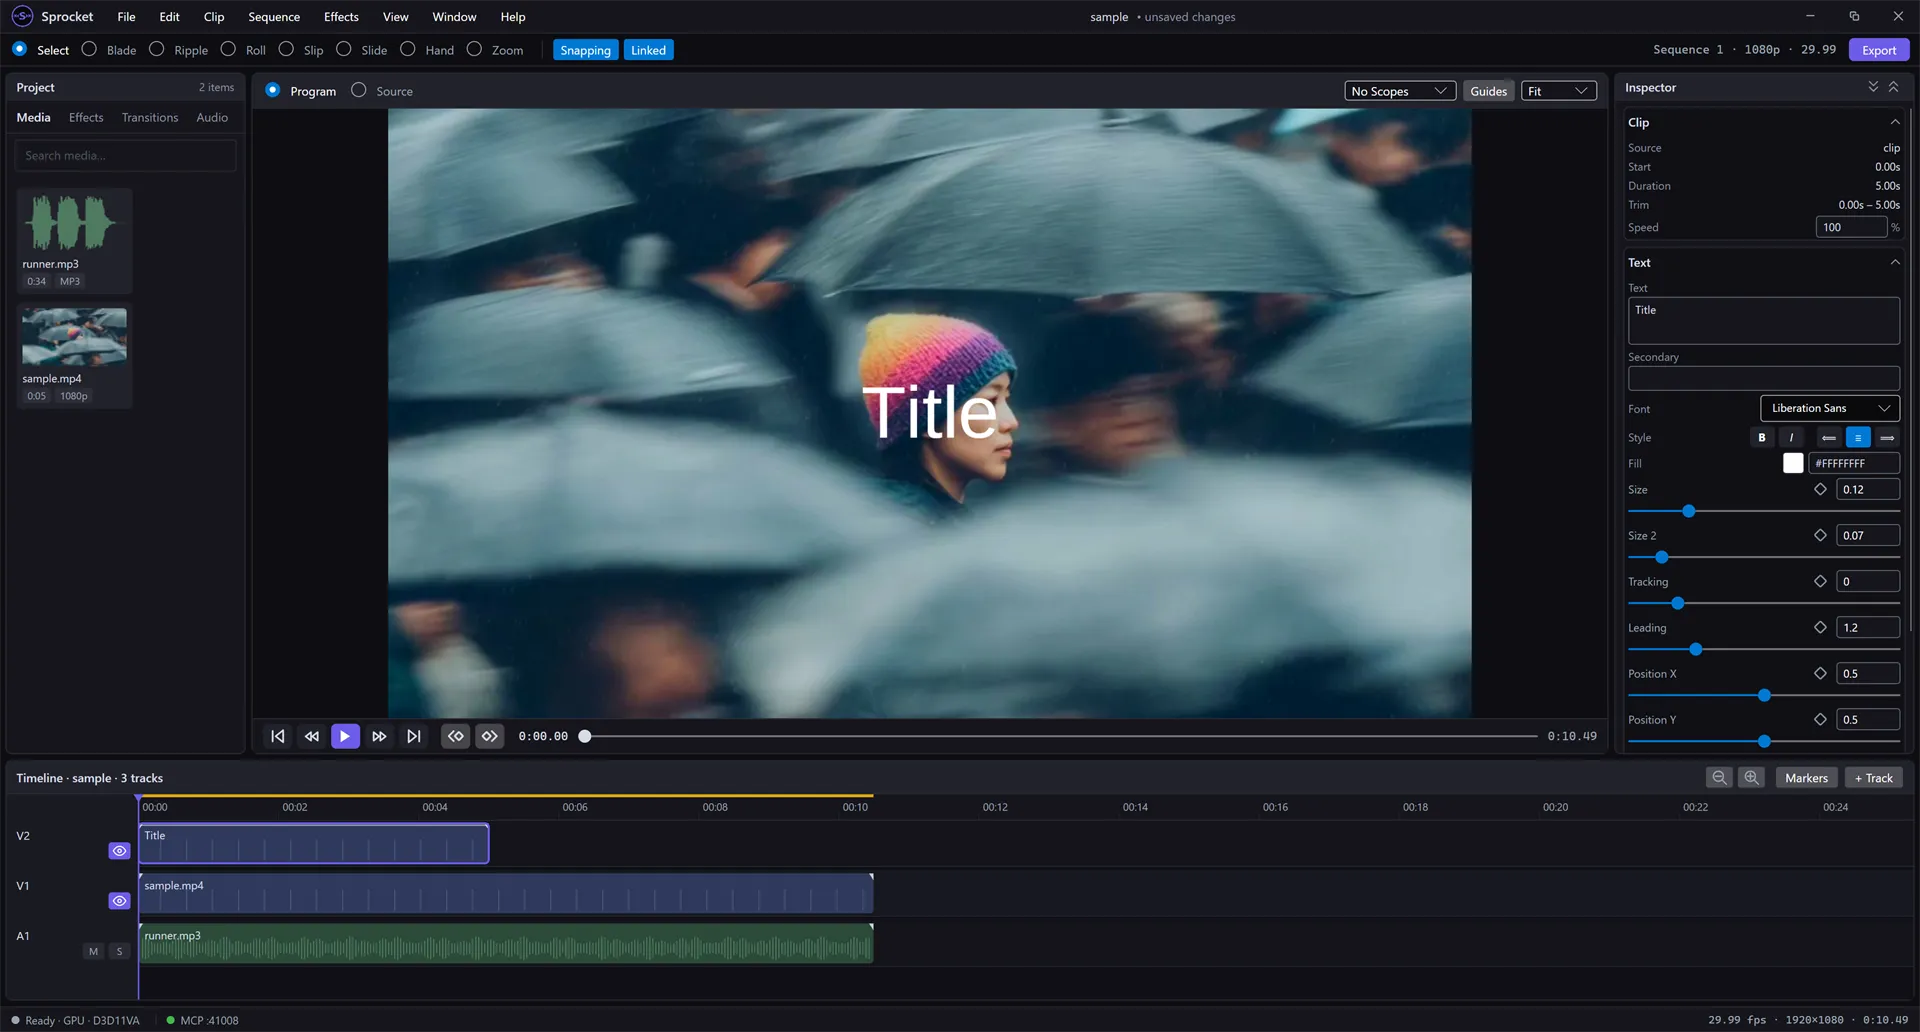
- Text — the everyday controls: the main Text and a Secondary line, a Font dropdown, three alignment buttons (left, centre, right), the Fill colour, Size, letter Tracking, line Leading, and the Position X / Y of the text on screen.
- Text Style — the decorative extras: a Stroke (outline) colour and width, a drop Shadow with its own colour, offset, and blur, and a Box colour and padding for a background panel behind the text (this is what gives a lower third its bar).
- Scroll & Animate — how the text moves: a scroll mode (None, Roll for credits, or Crawl), ease-in and ease-out, whether it starts and ends off-screen, and a reveal option.
Every one of these is a normal Inspector control, so you drag the slider, type an exact value, or click the colour swatch to pick a colour — the same way you adjust an effect on any other clip.
Tip: Because a lower third, credits roll, and crawl are all just titles with different starting settings, you can turn any one into another. Add a plain Title, then set its Scroll & Animate mode to Crawl to make it crawl.
Adjustment layers
Section titled “Adjustment layers”An adjustment layer is a clip with no picture of its own. Instead, any effects you put on it apply to every clip on the tracks below it, for as long as the layer lasts. It’s the tidy way to grade or stylise a whole run of clips at once, instead of copying the same effect onto each one.
Add it from Clip ▸ Insert ▸ Adjustment Layer. Sprocket places it on a track above your footage so it doesn’t push anything aside:
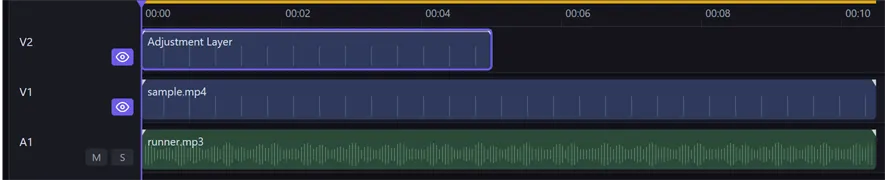
Now add effects to the adjustment layer the way you would to any clip — for example a Color effect or a colour-grading effect. The look applies to everything underneath the layer for its span. To limit which clips are affected, trim the adjustment layer so it only covers them; to change the look everywhere at once, edit the effect on the single layer.
Tip: Stack more than one adjustment layer for different looks over different parts of your edit — each one only affects the tracks below it, where it sits.
Related
Section titled “Related”- Editing on the timeline — moving, trimming, and arranging clips (including your titles).
- Change how a clip looks — the effects you can add to an adjustment layer.
- Color grading — grading tools that pair well with an adjustment layer.