Transitions
A hard cut drops you straight from one shot to the next. A transition eases the change instead — the outgoing clip blends into the incoming one over a short window, so the edit feels smooth rather than abrupt. Sprocket comes with the handful of transitions you’ll reach for most: a cross dissolve, two dips through black or white, and a wipe.
This guide shows you where to find them and how to drop one onto a cut.
If you haven’t arranged any clips yet, start with the Getting started guide and Editing on the timeline.
What’s in this guide
Section titled “What’s in this guide”- Before you start
- The transitions you can use
- Add a transition to a cut
- What a transition looks like on the timeline
- Remove a transition
- Good to know
Before you start
Section titled “Before you start”A transition goes on a cut — the point where one clip ends and the next begins — so you need two clips sitting next to each other on the same track, with no gap between them.
The quickest way to get there is File ▸ Open Sample Project, then split the video clip into two pieces with the Blade tool (see Split a clip with the Blade). The two halves now meet at a cut, ready for a transition.
The transitions you can use
Section titled “The transitions you can use”Open the Project panel on the left and click the Transitions tab. Each transition shows its name and a one-line description of what it does.
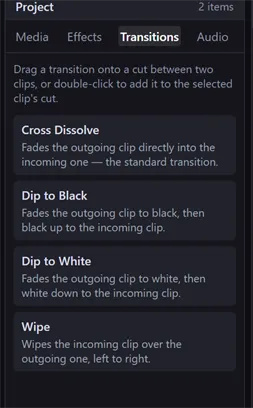
- Cross Dissolve — fades the outgoing clip directly into the incoming one. This is the standard transition and the one you’ll use most.
- Dip to Black — fades the outgoing clip down to black, then black up to the incoming clip. Good for marking a break in time or place.
- Dip to White — the same idea, but through white instead of black.
- Wipe — the incoming clip slides in over the outgoing one, left to right.
Add a transition to a cut
Section titled “Add a transition to a cut”There are two ways to apply a transition. Both put it on a cut between two adjacent clips.
Drag it onto the cut. Drag a transition from the Transitions tab and drop it onto the cut between your two clips. As you drag near a cut, Sprocket highlights where the transition will land, then snaps it to that cut when you release.
Or double-click it. Select one of the two clips beside the cut, then double-click the transition in the list. Sprocket adds it to that clip’s cut — the one it shares with the next clip if there is one, otherwise the cut with the previous clip.
Either way, the status bar confirms the result (for example, Added Cross Dissolve), and the new transition appears on the cut.
Tip: If nothing happens, the clip you selected probably doesn’t have a neighbor to blend with. A transition always needs two clips meeting at a cut — check that the clips are touching, with no gap between them.
What a transition looks like on the timeline
Section titled “What a transition looks like on the timeline”A transition shows up as a shaded box with a bow-tie X straddling the cut, centered on the edit point so it overlaps the end of the first clip and the start of the second.

Play across the cut in the Program monitor to see the transition in action — the picture eases from one clip into the next over the length of the box.
Remove a transition
Section titled “Remove a transition”- Switch to the Select tool.
- Click the transition’s box on the cut. Its outline brightens to show it’s selected.
- Press
Delete.
The transition is removed and your clips go back to a plain cut. As with every
edit in Sprocket, you can bring it back with Undo (Ctrl+Z).
Good to know
Section titled “Good to know”- Transitions land on a one-second window centered on the cut, trimmed to whole frames. On very short clips the window is shortened to fit.
- A transition needs footage on both sides of the cut. Because it overlaps the two clips, it blends the end of one shot with the start of the next — so it works best where both clips have a little room around the edit.
- To swap one transition for another, remove the one that’s there and add the one you want — Sprocket doesn’t replace it automatically.
Related
Section titled “Related”- Editing on the timeline — trim and arrange the clips you’ll be joining with transitions.
- Getting started — split a clip with the Blade tool to create a cut.
- Change how a clip looks with effects — fades and other looks you apply to a single clip.