Color grading
Color and Brightness (covered in Effects & the effect stack) handle the everyday adjustments — exposure, contrast, saturation. The rest of the Effects menu is a set of dedicated color-grading tools for when you want more control: balancing color casts, shaping shadows and highlights separately, or isolating a single color.
Every tool here works the same way as any other effect: select a clip, choose it from the Effects menu, and adjust it in the Inspector. You can add as many as you need to one clip — they stack.
Shooting log? Convert flat log footage to a normal picture first — see Working with log & camera footage.
What’s in this guide
Section titled “What’s in this guide”Judging your grade with scopes
Section titled “Judging your grade with scopes”Your eyes adapt to a screen quickly, which makes it easy to misjudge color by looking alone. The Scopes menu, next to the Program monitor’s Guides button, overlays a technical readout of the current frame underneath the preview:
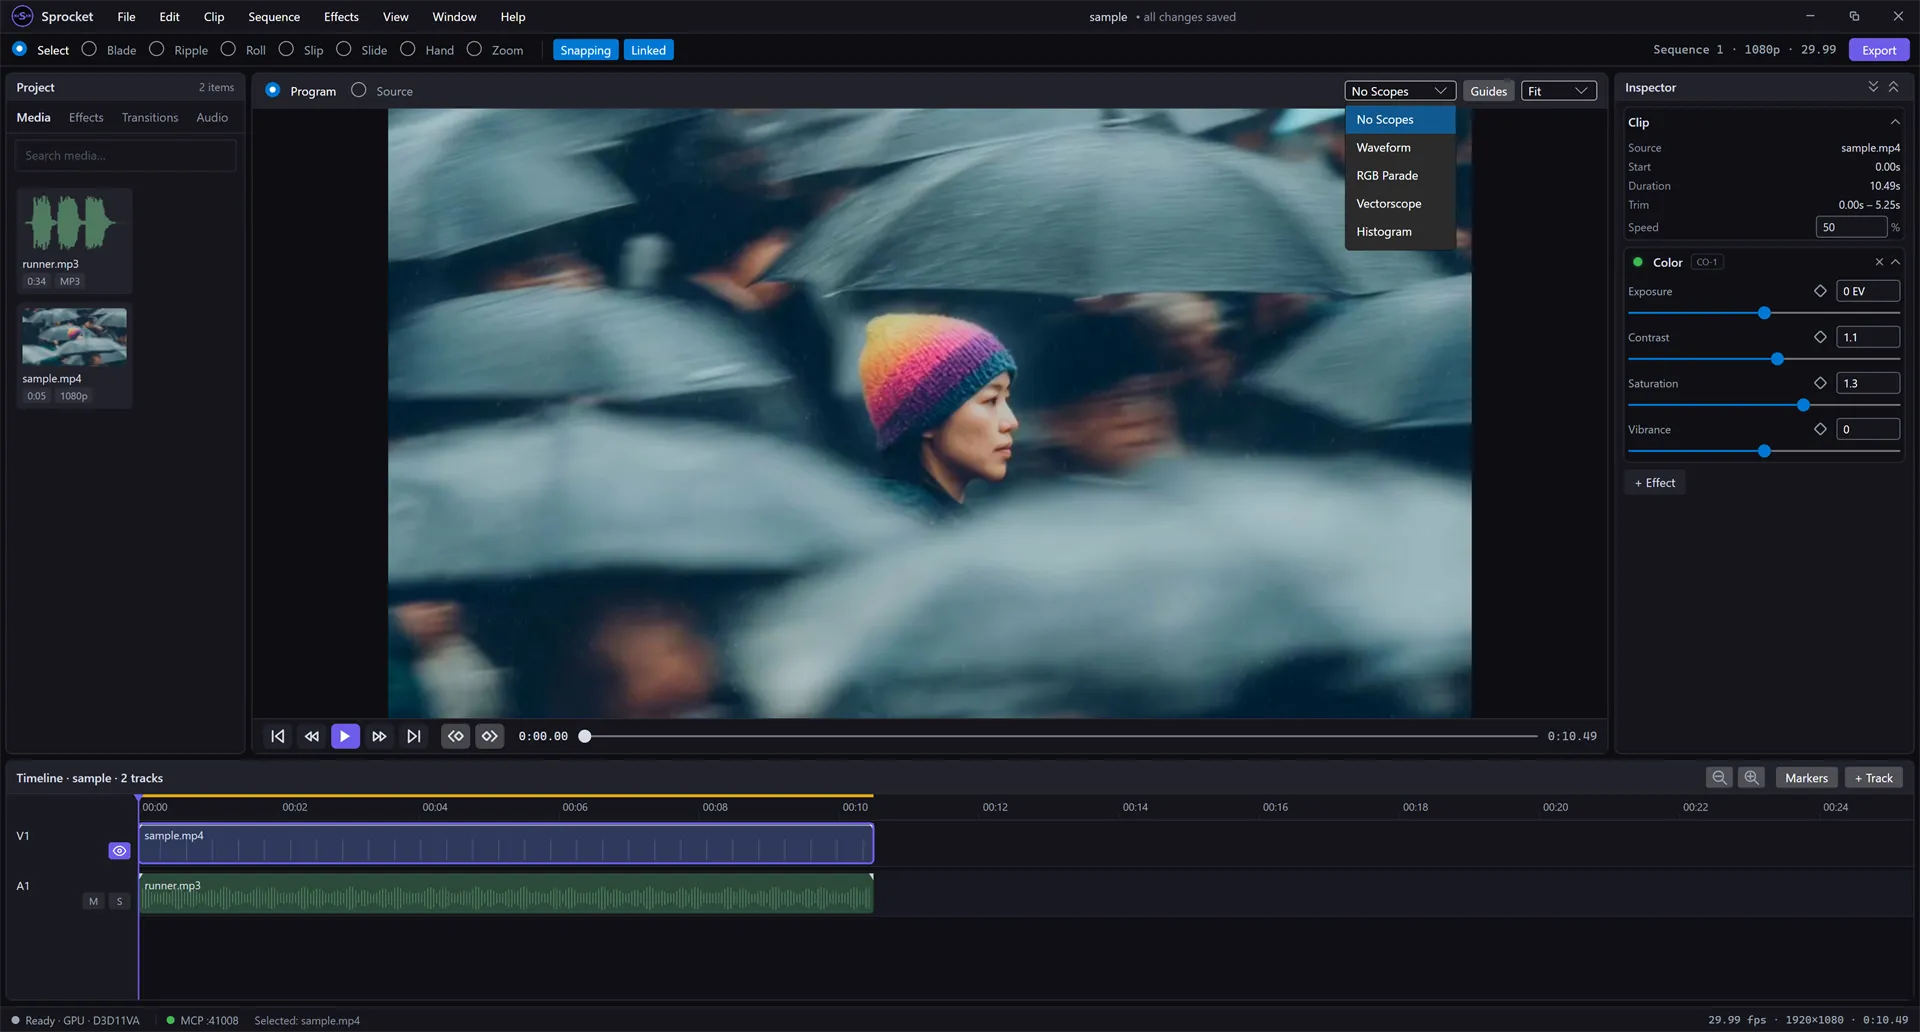
- Waveform — plots brightness across the frame from left to right, so you can see at a glance whether your shadows are crushed or your highlights are blown out.
- RGB Parade — the same idea as Waveform, but split into separate red, green, and blue traces, useful for spotting a color cast.
- Vectorscope — plots color as a dot cloud around a wheel; the direction shows the hue and the distance from center shows how saturated it is.
- Histogram — a standard brightness histogram across the whole frame.
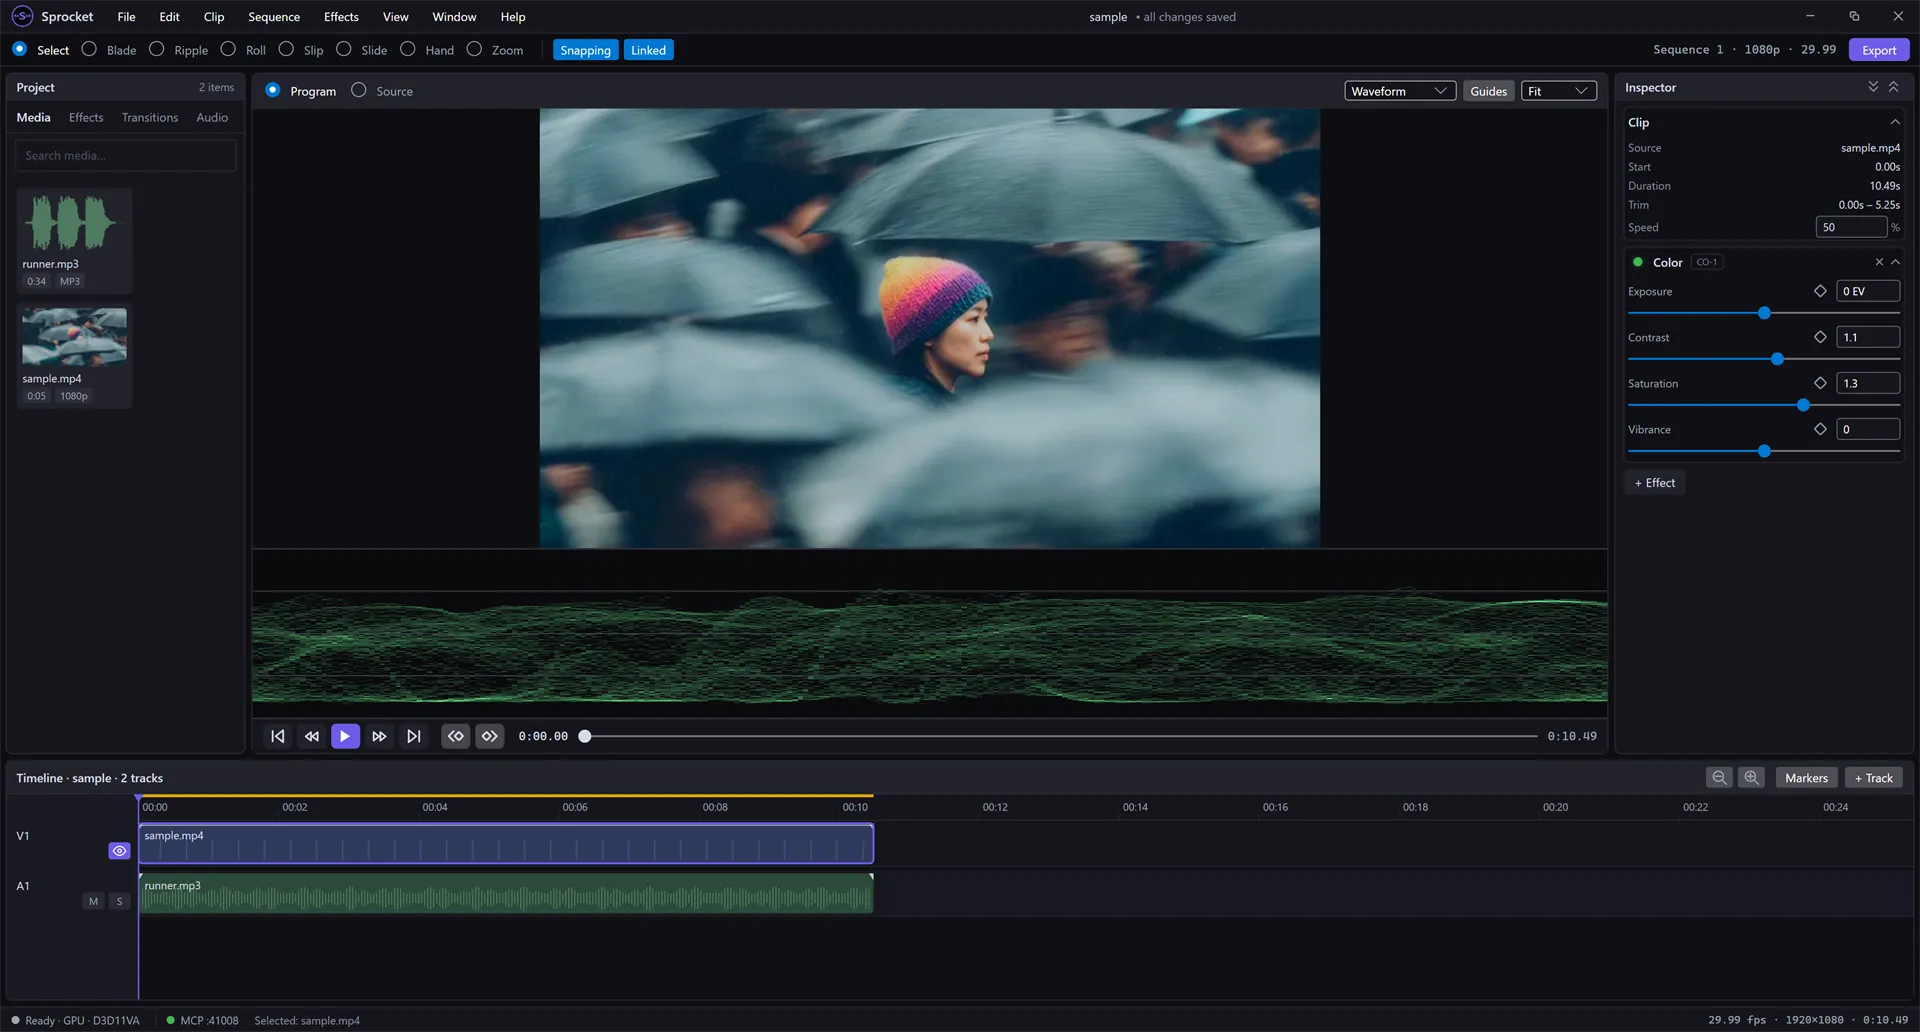
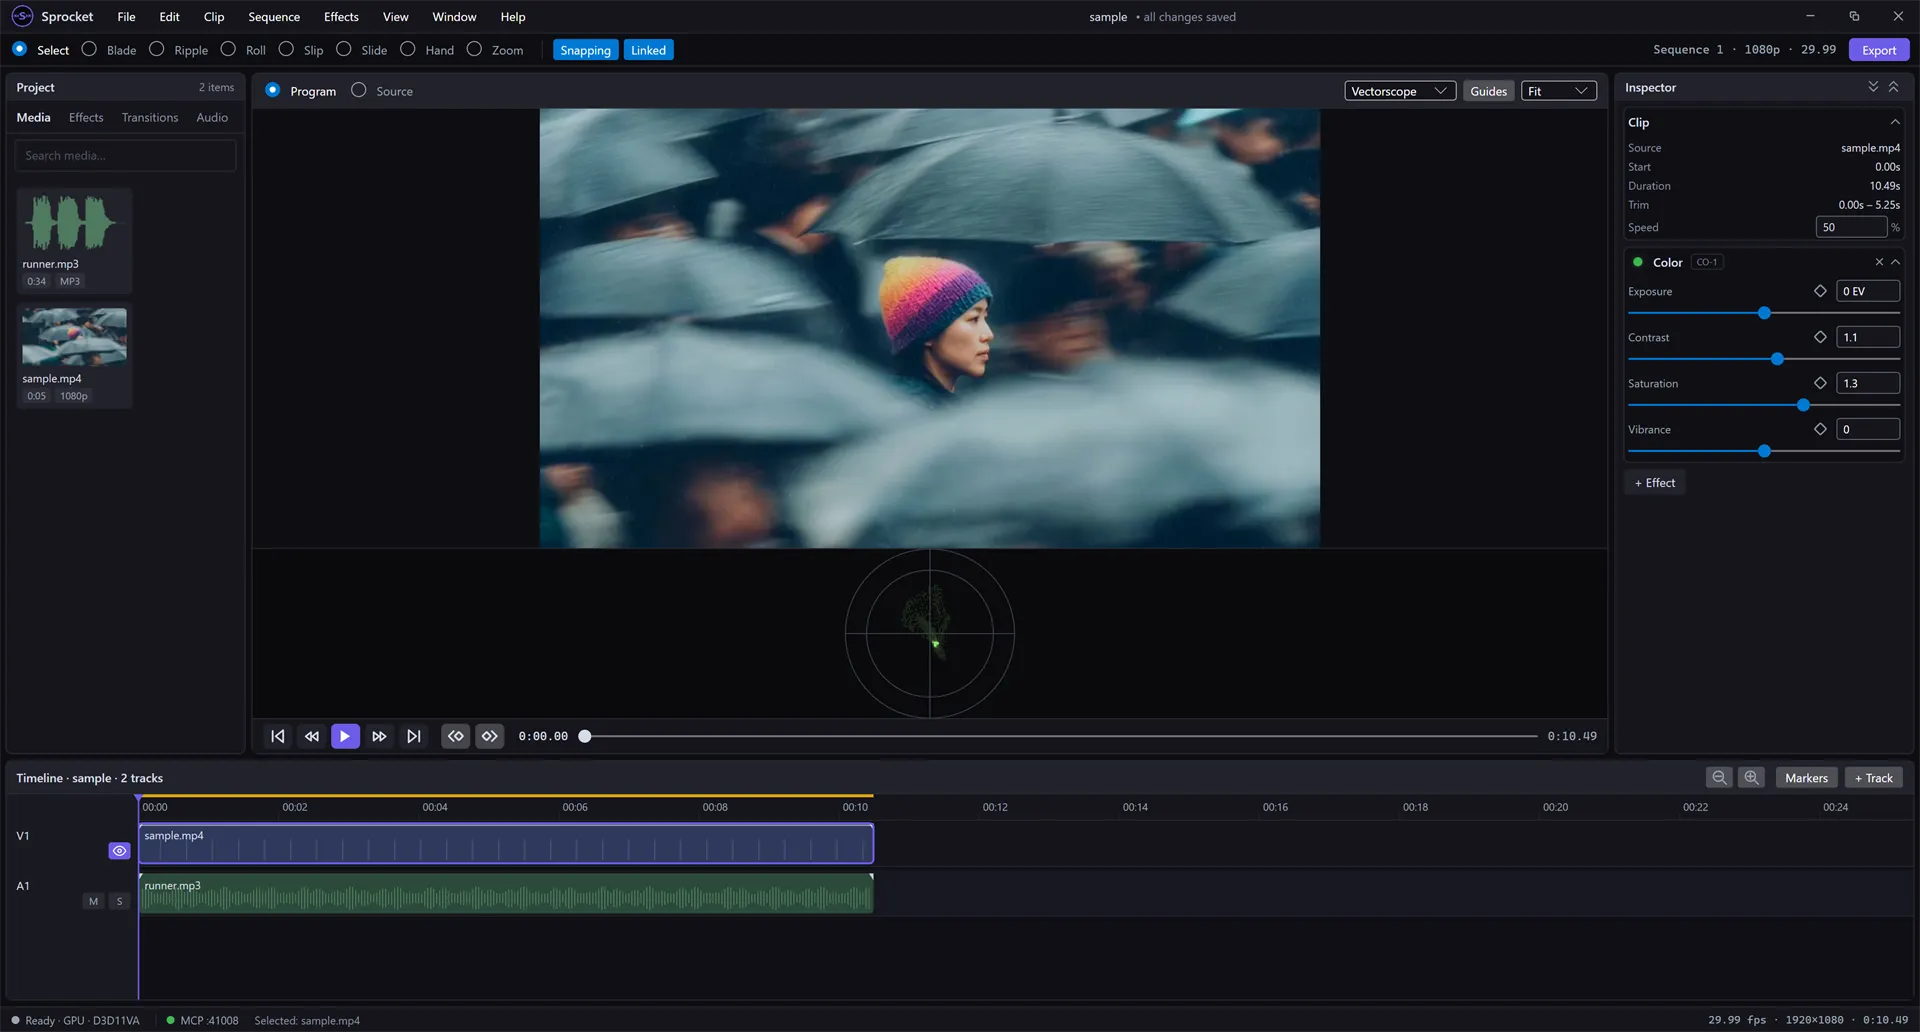
Tip: Turn on a scope before you start grading a shot, and leave it on. It’s much easier to catch a problem as you introduce it than to spot it afterward.
White Balance
Section titled “White Balance”Temperature and Tint correct a color cast — footage that looks too blue (shot in shade or under overcast sky) or too orange (shot under tungsten light).
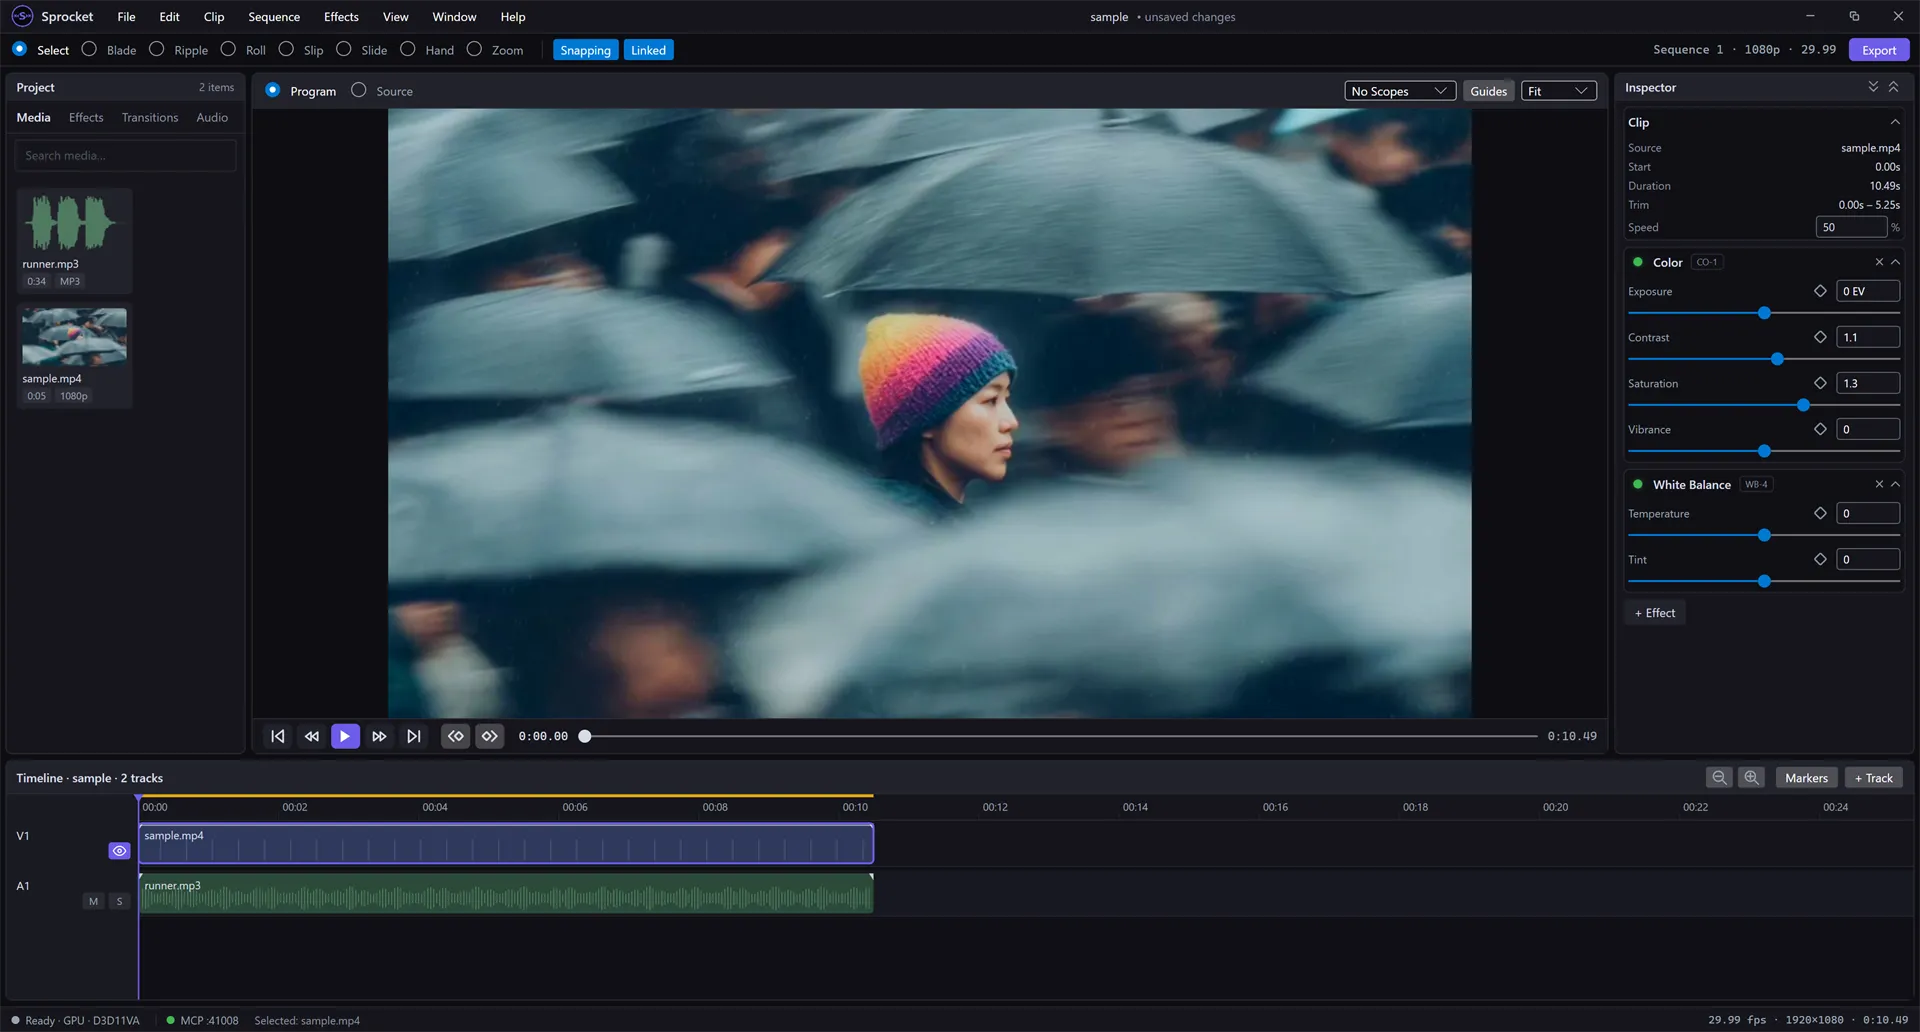
- Temperature shifts the image between blue and orange.
- Tint shifts it between green and magenta, for casts that Temperature alone doesn’t fix.
Use the Vectorscope while you adjust these — a neutral gray or white object in your shot should sit at the very center of the wheel once the cast is corrected.
Color Wheels
Section titled “Color Wheels”Color Wheels is a classic three-way color corrector: three trackball-style wheels give you separate control over the shadows, midtones, and highlights of the image.
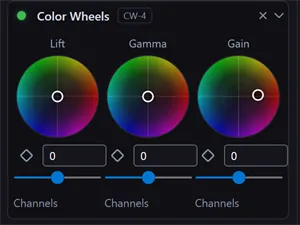
- Lift — shifts the shadows (the darkest parts of the image).
- Gamma — shifts the midtones.
- Gain — shifts the highlights (the brightest parts).
Each wheel works the same way:
- Drag anywhere on the wheel to tint that tonal range — the white puck
jumps to where you point, and the further it sits from the center, the
stronger the tint. Hold
Shiftwhile dragging for fine adjustments. - Double-click a wheel to recentre its puck and remove the tint.
- The slider underneath brightens or darkens that range without changing its color — the slider under Lift raises or lowers the shadows, and so on.
- Channels (below each slider) opens individual R, G, and B sliders for that range, if you’d rather work with exact numbers than drag the wheel.
For example, to pull a blue cast out of the shadows, drag the Lift puck
slightly away from blue (toward yellow); to warm up the highlights, drag the
Gain puck a little toward orange. A whole drag is a single undo step, so
Ctrl+Z takes back the entire move, not one pixel of it.
Tip: Small moves go a long way here. A little bit of blue in the shadows and a little warmth in the highlights is a classic, subtle look — pushing a puck far from the center starts to look unnatural fast.
Curves
Section titled “Curves”Curves adjusts the tonal response of the image at five points — Blacks, Shadows, Mids, Highlights, and Whites — running from the darkest to the brightest part of the picture.
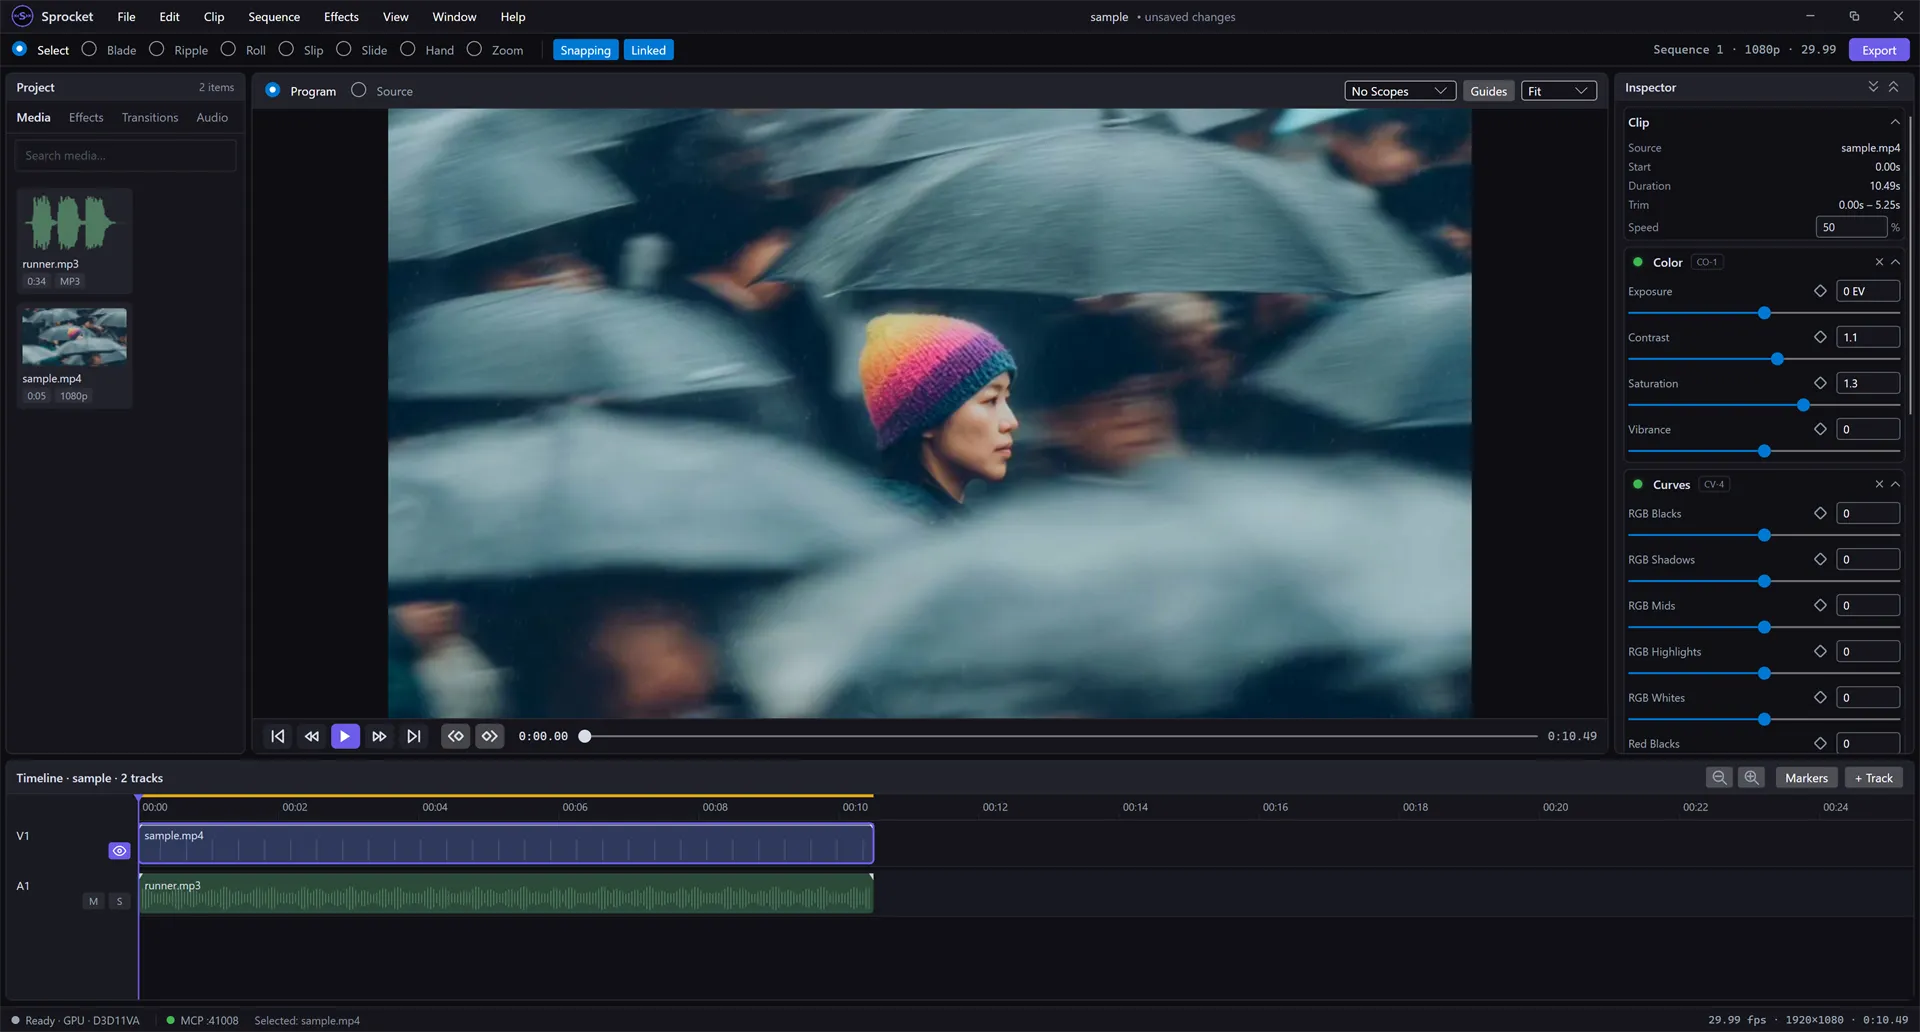
The RGB group adjusts all three color channels together, affecting overall contrast and brightness at each of the five points. Below it, separate Red, Green, and Blue groups let you push an individual color channel at the same five points — useful for correcting a cast that only shows up in part of the tonal range (green shadows but otherwise-neutral highlights, for example) rather than the whole image evenly.
HSL Qualifier
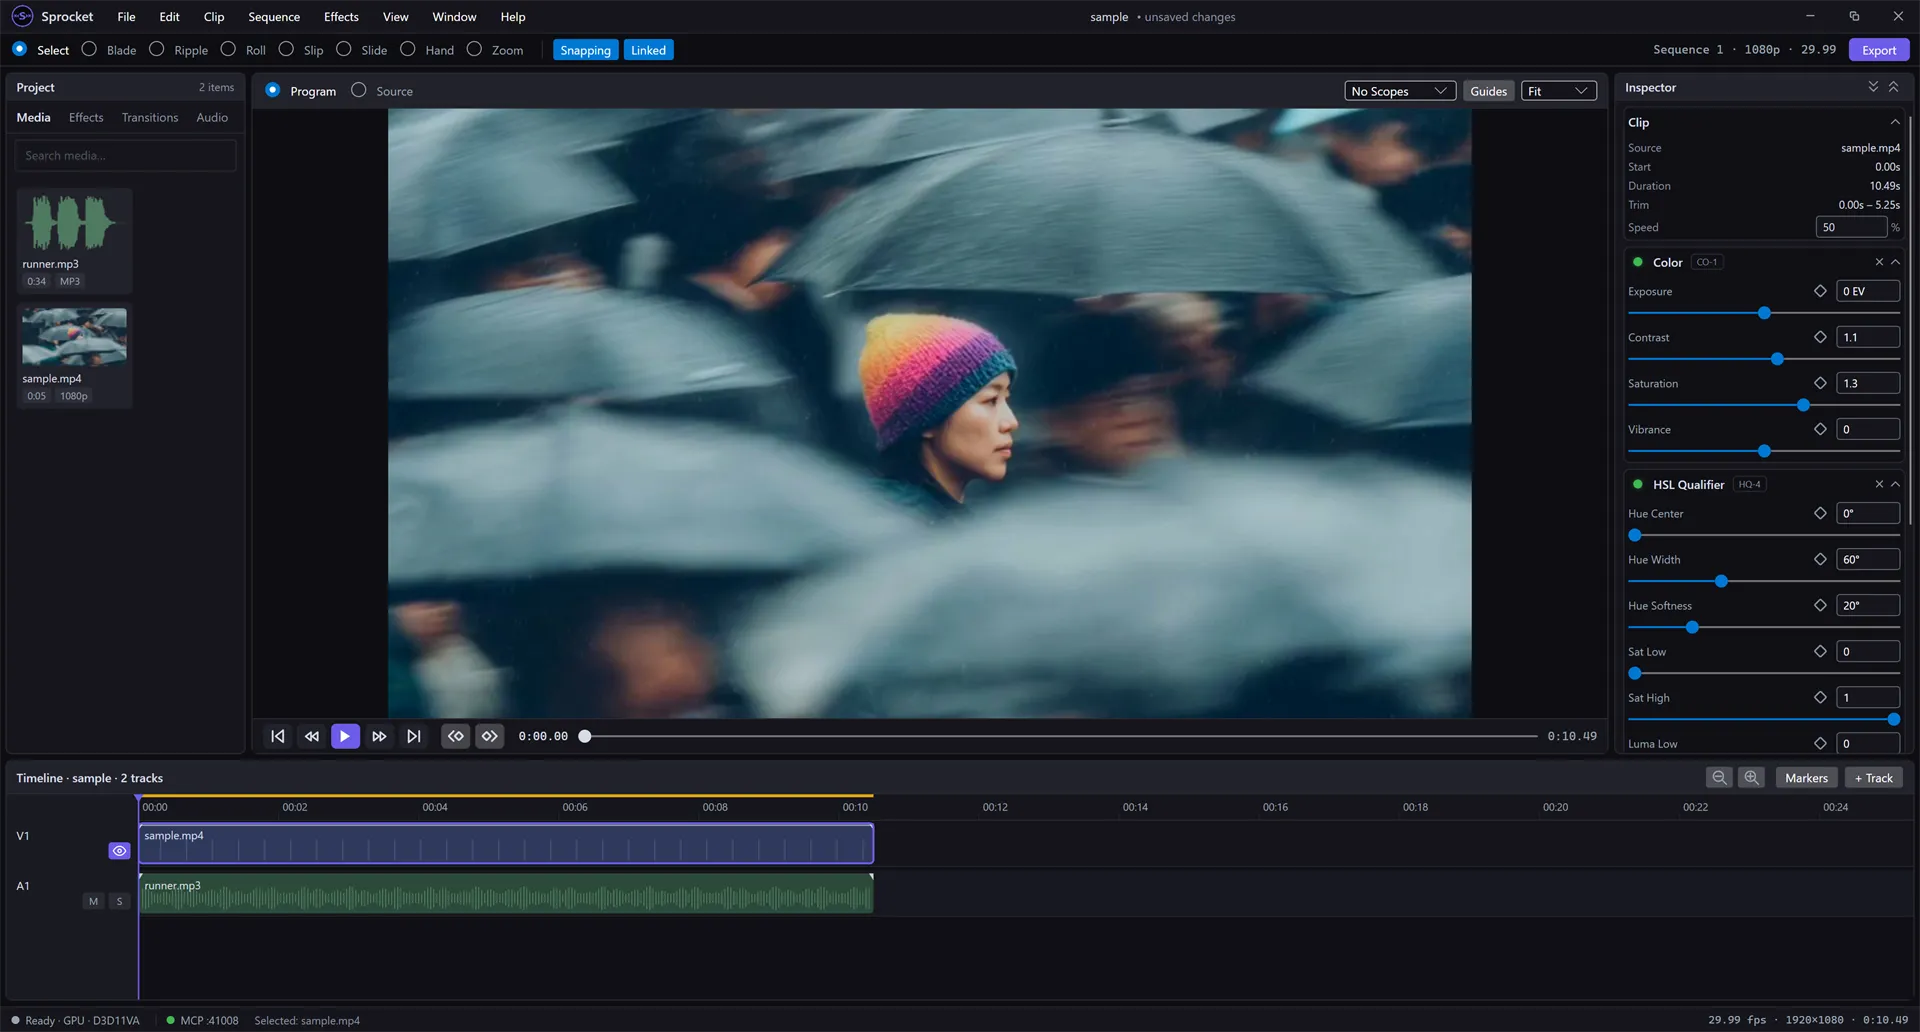
Section titled “HSL Qualifier”The tools so far all affect the entire frame. HSL Qualifier is different — it isolates a range of color first, then applies a correction to only that range. This is how you change the color of one thing in a shot (a sky, a piece of clothing, a logo) without touching everything else.
Work through it top to bottom:
- Hue Center and Hue Width pick the range of colors to select, and Hue Softness feathers the edge of that selection. Sat Low/Sat High and Luma Low/Luma High narrow the selection further by saturation and brightness.
- Turn on Show Mask while you’re setting up the selection — it replaces the preview with a black-and-white mask so you can see exactly what’s selected before you apply any correction.
- Once the selection looks right, turn Show Mask back off and use Hue Shift, Saturation, and Exposure to correct just that color.
Tip: Widen Hue Softness if the correction looks like it has a hard, visible edge around it — a softer selection blends more naturally into the rest of the frame.
Related
Section titled “Related”- Effects & the effect stack — the everyday Color, Brightness, Transform, and Fade effects.
- Working with log & camera footage — convert flat log footage to a normal picture before grading it.
- A quick tour of the main screen — the Program monitor’s Guides and Fit controls.