Projects and saving
A project is your edit: the tracks, clips, trims, effects, and markers that make up your movie. Sprocket saves all of that in a small project file. It does not save your video and audio inside that file — it just remembers where those files live and how you’ve arranged them, so your originals stay untouched and your project file stays small.
This guide covers everything about looking after that project file: starting and opening projects, saving, the safety net of autosave and crash recovery, and how to reconnect media that has moved.
What’s in this guide
Section titled “What’s in this guide”- Start, open, and switch projects
- Save your project
- The unsaved-changes safety check
- Autosave and crash recovery
- Change how often Sprocket autosaves
- Relink moved or missing media
Start, open, and switch projects
Section titled “Start, open, and switch projects”Everything to do with projects lives at the top of the File menu:
- New Project (
Ctrl+N) — start from scratch with one video track (V1) and one audio track (A1). - Open Project… (
Ctrl+O) — reopen a project file you saved earlier. - Open Recent — jump straight back into a project you worked on lately, without hunting for the file. See below.
- Open Sample Project — load the built-in sample (a short video and its audio) so you have something to practice on right away.
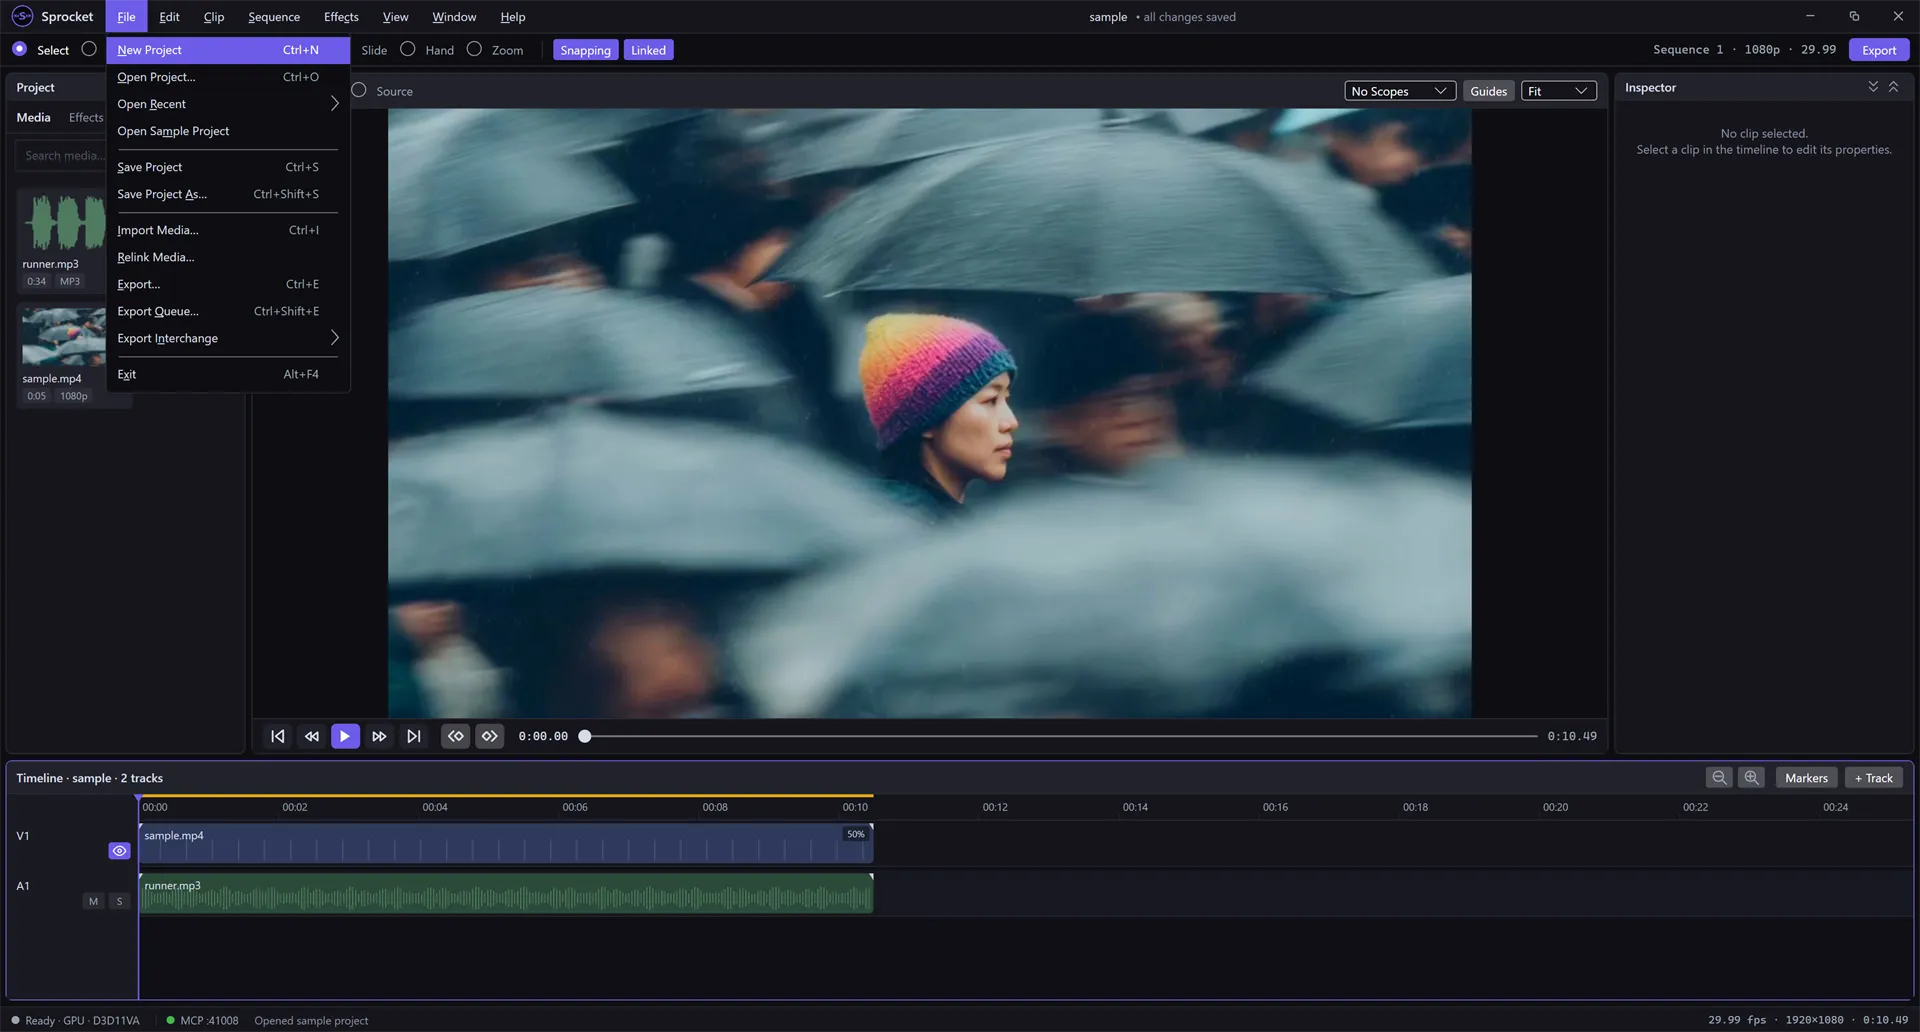
Sprocket edits one project at a time. Whenever you start a new project or open another one, it replaces what’s currently on screen — so if the project you’re leaving has changes you haven’t saved, Sprocket stops and asks first.
Tip: The sample and any new project start out untitled — the first time you save, Sprocket asks where to put the file. Saving never changes the bundled sample, so you can experiment freely.
Reopen a recent project
Section titled “Reopen a recent project”Sprocket keeps a list of the projects you’ve opened or saved most recently, so getting back to yesterday’s edit takes two clicks.
- Open the File menu and point to Open Recent.
- Click the project you want. The newest is at the top.
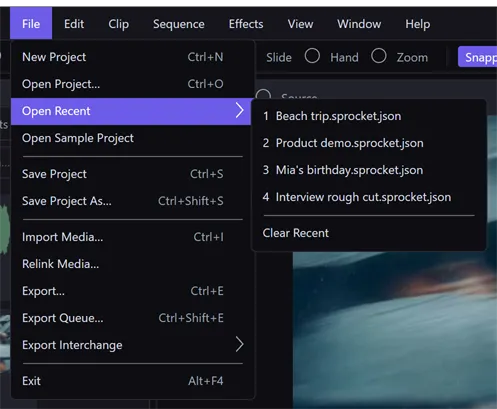
A few things to know about the list:
- It holds your 10 most recent projects, numbered from newest to oldest.
- Only the file name is shown. To see where a project lives on disk, hover over it for a moment and its full path appears.
- A project gets added (or moved back to the top) whenever you open it or save it. The sample and new projects join the list once you save them.
- If a project file has been moved or deleted, or can’t be opened, it drops off the list on its own, and the status bar says why.
- To empty the list, choose Clear Recent at the bottom. This only forgets the list — your project files aren’t touched. When the list is empty, the submenu shows No Recent Projects.
Opening a recent project works just like Open Project…: if your current project has unsaved changes, Sprocket asks first, and if there’s a newer autosave, you’re offered crash recovery.
Save your project
Section titled “Save your project”Save your work with File ▸ Save Project (Ctrl+S). The first time, Sprocket
asks where to put the project file and what to name it. After that, Ctrl+S
saves straight over that same file.
You always know where you stand from the indicator at the top of the window, next to the project name:
- • all changes saved — everything is written to disk.
- • unsaved changes — you’ve edited since the last save.
To keep a separate copy — for a different version or a backup — use File ▸
Save Project As… (Ctrl+Shift+S). This writes the current project to a new
file and leaves the original untouched; from then on you’re working in the new
copy.
A saved project remembers your timeline and edits, not the video itself. Keep your original media files where they are. If you do move them, use Relink Media to point Sprocket at their new location.
The unsaved-changes safety check
Section titled “The unsaved-changes safety check”Sprocket won’t let you throw away work by accident. If you start a new project, open another one (including the sample), close the window, or quit Sprocket while you have unsaved changes, it stops and asks:
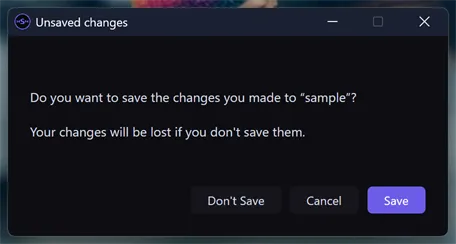
- Click Save to save your changes and then carry on. If the project has
never been saved, Sprocket first asks where to put the file. Save is the
default, so pressing
Entersaves. - Click Don’t Save to abandon the unsaved changes and continue. The autosave copy of those changes is deleted too, so you won’t be offered them again later.
- Click Cancel (or press
Esc) to go back to your project with nothing changed.
If you choose Save but then cancel the save window, or the save fails, Sprocket stays put rather than going ahead, so your changes are never lost that way.
If everything is already saved, you won’t see this prompt — Sprocket only asks when there’s something to lose.
Tip: If an export is still running when you close or quit, Sprocket asks about that first: Keep Exporting leaves everything as it is, and Cancel Export and Close stops the export (deleting the partly written file) and closes. Exports that have already finished aren’t affected.
Autosave and crash recovery
Section titled “Autosave and crash recovery”On top of your manual saves, Sprocket quietly autosaves in the background while you work. Every few seconds, if you’ve made changes, it writes a recovery copy alongside your project file. This happens off to the side and never interrupts you — it’s a safety net, not a replacement for saving.
The autosave copy is there for one job: getting your work back if Sprocket or your computer shuts down unexpectedly before you had a chance to save.
If a crash happens, the next time you open that project Sprocket notices the recovery copy is newer than your last save and asks what to do:
Recover unsaved changes? — A more recent autosave was found for this project — it may contain changes that weren’t saved before the app last closed. Recover it, or discard the autosave and open the last saved version?
- Click Recover to load the autosaved version, with the changes that hadn’t
been saved yet. The project opens showing • unsaved changes, because those
changes aren’t in your project file yet. Save it (
Ctrl+S) to make them permanent. - Click Discard autosave to delete the recovery copy and open your last manual save instead.
If you close the prompt without choosing either, Sprocket opens your last manual save but keeps the recovery copy, so you’ll be asked again the next time you open the project.
When you save normally, the recovery copy has done its job and is cleared out, so you’ll never be offered a stale one.
Tip: Autosave protects a project you’ve saved at least once especially well, because the recovery copy sits right next to your project file. Getting your first manual save in early means the safety net is fully in place.
Change how often Sprocket autosaves
Section titled “Change how often Sprocket autosaves”By default Sprocket autosaves every 5 seconds. To change that, open Edit ▸
Preferences… (Ctrl+,) and find the Autosave section.

Set Interval to any number of seconds from 1 to 600 (ten minutes). A shorter interval saves more often; a longer one writes to disk less frequently. The default suits most projects.
Relink moved or missing media
Section titled “Relink moved or missing media”Because a project file only points at your video and audio, moving or renaming those files after you’ve built an edit leaves the project unable to find them. Clips whose media is missing show up offline — they play as black or silence until you reconnect them. Relink Media fixes this in one pass by searching a folder you choose for the missing files.
- Choose File ▸ Relink Media….
- If nothing is offline, Sprocket tells you there’s nothing to relink and stops. Otherwise, pick the folder where the moved files now live. Sprocket searches it (including subfolders) for files matching your offline media by name.
- Sprocket shows a preview of what it found — how many offline sources it matched, and how many it couldn’t (unmatched files, or ones with several possible matches, are left offline). Review it, then click Relink to apply, or Cancel to back out.
Your offline clips reconnect to the found files and start showing their picture
and sound again. If your project has been saved, the new links are remembered
with it; if it’s still untitled, save it (Ctrl+S) to keep the reconnected
media.
Tip: Relinking matches by file name, so it works best when you’ve moved or copied files without renaming them. If several files share a name, Sprocket leaves those offline rather than guess — move the right one into its own folder and relink again.
Related
Section titled “Related”- Getting started with Sprocket — the first-project walkthrough, including a quick take on saving and undo and redo.
- Importing and organizing media — bringing video and audio into a project in the first place.
- Keyboard shortcut reference — every shortcut,
including
Ctrl+Yas an extra Redo key on Windows and Linux.